Posts

Showing posts from November, 2015

Paper Weight or Candle Tower!

Image
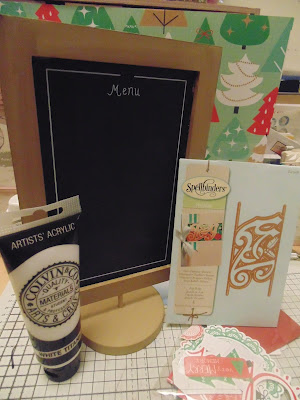
Good Morning Crafters   We have a conundrum for you today, Pandy has a project which could either be a paper weight or a candle tower?  What do you think?   Check out the Stockist Locator on the Personal Impressions website for a stockist near you for products Pandy has used in her project. You will need an old wooden block - nothing special – I found this one in the street on the way home and felt sorry for it!   Marianne Design Pretty Papers Bloc - French Roses Memento Ink Pad - Rose Bud Ranger Distress Ink Pad - Walnut Stain Ranger Crackle Accents Any basic paint to undercoat the wood block PVA Glue     Step 1   Give your wood block a couple of light coats of a basic acrylic paint to seal it and give the PVA something to adhere to.     Step 2   Tear up pages of the French Roses papers into small, rough chunks - don't be tidy - the rougher the better.  Ink all the edges with the Memento ink pad Rose Bud p leave until it is rea

Christmas Menu

Image
Good Morning Crafters   Today we have a great idea from Gill, a Christmas Menu table decoration.   Check out the Stockist Locator on the home page of the Personal Impressions website.   Products used to create the following: Papers from Kaisercraft Holly Jolly Collection Joy Strip Die from Spellbinders Christmas F lowers die Other products: Acrylic Paint in white Titanium Masking tape Silicone Glue Gel Menu Board   Step 1   Mask the chalk board and paint 3 coats of acrylic poster paint. Once dried I distressed the edges slightly with Tim Holtz Distress Ink in walnut stair.     Step 2   Cut out all your die pieces and distress the edges. Make up the flowers using Silicone glue to give dimension   Step 3   Arrange and glue the flowers to the bottom right hand corner of the board and the Joy die cut card on the top left hand corner. Gill has finished off with chalked 'Mince Pies and Coffee' but y

You're so Special

Image
Good Morning Crafters   Today we are sharing Mags project using products from Craftexcess   Have you checked out the bargains over on the website?   Products you will need for this project:   My Paper Stash Flawless Florals Topper and Paper Set Sweet Petites Flowers by Petaloo Wilted Violet Tim Holtz Distress Ink Additional products required:   7in scalloped card blank Stamping Card Small pearls Ribbon   Step 1 Cut a piece of stamping card to fit the card blank.  Blend the wilted violet distress ink around the edges.   Step 2 Stick a piece of the backing paper onto the right hand side of the distressed panel.   Matt the topper onto some purple card  and attach to the card panel.   Wrap some ribbon around the panel on the left hand side and adhere this panel to the card blank.   Step 3 Embellish the card using some of the Petaloo flowers and some pearls to two of the corners.   Ma

Recycle with Graphic 45

Image
Good Morning Crafters   Today we are sharing with you a recycle project by Sandra.   Sandra has made a beautiful book using toilet roll holders.   Don't forget to check out our Stockist Locator on the home page of Personal Impressions website for a stockist near you.   For this project you will need:   You will need 6 rolls Black Gesso A Christmas Carol Papers Black card Glue Hole Punch     Step 1   Flatten your rolls flat and paint the edges inside and out with your Gesso Whilst these are drying measure the open side of your roll mine was 3 "     Step 2   Cut 6 pieces of card 3"x 2" score at every 1/2 inch Fold these in half on the middle score line and punch holes ensuring that they all line up     Step 3 Cut your papers to size to add to front and back of the rolls   Step 4   Make some tags to fit inside       Step 5   Add rings to hold them to

Shabby Chic Recycling

Image
Good Morning Crafters   I asked the sample makers to think outside the box when creating projects with new products they were sent.   Sam has come up with recycling a jam jar!   Products used are available on Personal ImpressionsWebsite .   List of Products First Edition, Deco Mache Decoupage Papers - Blue Paisley. Viva Paper Flowers. Studio Light Paper Pad, Shabby Chic. Inka Gold - Aquamarine. Decopatch glossy glue. Distress Inks - Peeled Paint, Stormy Sky, Picked Raspberry. Jam Jar. Paper punch, Ribbon, lace, gems, natural fibres, small draw handle and stamons.   Cut a piece of the Decopatch Paper to cover the jar. Paint the glue onto the jar and stick the paper to the glass, then apply another layer of glue over the top. Cover the lid with small torn pieces of the paper and glue.   Spray the flowers with water. Ink some colours onto a mat, spray with water and wipe the flowers though the ink. Leave to dry.

Dad's Shed

Image
Good Morning Crafters   Today we have Elaine's project to share with you!   She has used products from the Personal Impressions Website! We have a Stockist Locator on the home page to enable you to find a stockist near you!   Products used: Lindsay Mason Shelves Stamp Walnut Stain & Gathered Twigs Distress Ink Pads Tim Holtz Wood Grain Embossing Folder Tim Holtz Type Set Letters Kraft Card White Stamping Card Memento Tuxedo Black Ink Pad Alcohol Markers Cardboard   Step 1 Cut a piece of Kraft card to fit the embossing folder and blend together walnut stain & gathered twigs onto the card. Next ink the embossing folder by applying the ink pad direct to the folder, then run this through you die cutting machine.   Step 2 Here I am showing the effect after running the card through the embossing machine, you could use ether side as they are both fab effects!   Step 3  Next using Tim Holtz al

Robin Cushion

Image
Good Morning Crafters   Today Pandy has created a beautiful cushion. She has used the Robin template from the Craftexcess website.   You will need the following for this project   Personal Impressions Template – Chirpy Robin (PIT014) Scraps of Robin colour fabrics Backing fabric Bondaweb Threads to over sew and decorate Button for eye Kitten tip – Bondaweb web is a type of fabric adhesive.  It comes as a layer of glue on a sheet that you iron onto the back of a fabric.  It is really easy to use and seals the fabrics together flat.  It will work with any fabric that will take a hot iron.  It is available in shops that sell fabric – haberdashery departments - and most good general craft shops.   Step 1    Cut out the template shapes.  Iron the Bondaweb to the back of the fabric.  Draw round the shape on to the paper backing – remember to keep the writing on the template face down then the pieces will all face the same way.  Cut out the shape.

3D Christmas Tree

Image
Good Morning Crafters   Today we are sharing Pandy's project!   She has used products from the CraftExcess website, there are some fabulous bargains to be had! 3D Christmas Tree Using Maya Road Chipboard Shaped Album Christmas Tree    You will need 2 plain pages from the Maya Road Christmas Tree chipboard album Viva Chalk paint in the dark green and the light green  Lots of pretties to decorate your tree with   Cut 2 slots in the tree shapes.  One half way down from the top – the other half way up from the bottom.  Make the slots slightly wider than the thickness of the board.   Cover the whole shape with the dark green paint – when it’s dry – sponge over with a little of the light green for texture.  Use a rough sponge so that you get lots of bumps.   Trim the bottom of the tree trunk so that it is flat.  Slot the 2 halves together.     Decorate with all the pretty bling you have. Thank you for stopping by Today    

Flutterby Butterfly

Image
Good Morning Crafters   Today Samantha is sharing a project with you using products from the Craftexcess website.   Have you checked out the website?  What are your thoughts?     Kay & Company Designer Mat Pad. Petaloo Celebrations Hydrangeas. Self Adhesive Crystals All from   Craftexcess   Also Sweet Dixie Elegant Borders Die  Stickles Cinnamon from PI.   Step 1   Use the butterfly paper and cut out 5 different size butterflies and die cut 3 borders. Use a ball tool and a matt, to give them some shape.   Step 2   Colour the glitter flowers with bright Distress Inks, Twisted Citron,Mustard Seed and Frayed Burlap. Add the inks to a matt, spray with water and push the flowers into the ink. When dry squeeze between to fingers to bring them to life.   Step 3   Glue base paper to card, run stickles round edge of paper. Glue on borders.   Step 4   Glue the flowers and butterflies across the card. Add