Robin Cushion
Good Morning Crafters
Today Pandy has created a beautiful cushion.
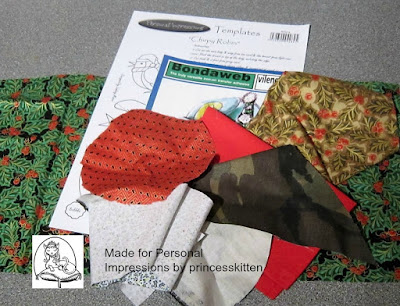
You will need the following for this project
Personal Impressions Template – Chirpy Robin (PIT014)
Scraps of Robin colour fabrics
Backing fabric
Bondaweb
Threads to over sew and decorate
Button for eye
Kitten tip – Bondaweb web is a type of fabric adhesive. It comes as a layer of glue on a sheet that you iron onto the back of a fabric. It is really easy to use and seals the fabrics together flat. It will work with any fabric that will take a hot iron. It is available in shops that sell fabric – haberdashery departments - and most good general craft shops.


 Add some decorative top stitching round all the pieces to add detail. You can machine sew – or sew by hand.


Step 1
Cut out the template shapes. Iron the Bondaweb to the back of the fabric. Draw round the shape on to the paper backing – remember to keep the writing on the template face down then the pieces will all face the same way. Cut out the shape.

Step 2
Cut out all the shapes you need first.

Step 3
Then organise your shapes onto the backing fabric so you know which order to fix them in. Peel off the backing paper and iron the shapes in place one by one.

Step 4

Step 5
I made a cushion from an old pillow slip and hand sewed the robin patch in the centre.

What a lovely idea and a lovely keepsake too!
Thank you for visiting today!
Thank you for visiting today!


Comments
Post a Comment