Sweet Dixie Floral Bouquet Part 2
Good Morning Crafters
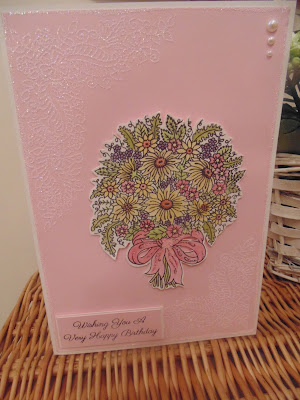
Today we have part 2 in the series of projects using Sweet Dixie Floral Bouquet by Gill.
Check out the Personal Impressions website all the new Sweet Dixie stamps and dies!
You will need the following for this project:
Sweet Dixie Floral Bouquet
stamp
Sweet Dixie Fantasy
Floral Corners Stamp
Sweet Dixie Embossing
Powder - Pink Sparkle
Sweet Dixie Smooth
card stock - Rose and Ivory
Promarker watercolour
pens
Memento Ink - Tuxedo
Black
Step 1
As the stamp was new I like to stamp it several times as the more you use it the more clarity you get.
Once I was happy with the image I blasted it with the heat gone to dry the ink completely before I started to colour the image with watercolour pens.
I scribbled the pen on a glass cutting board and used my brush and a little water to blend the colours
Step 2
Once the image was coloured I left it to dry and then fussy cut around it
Step 3
I was making n A5 sized card so made the card blank by folding a piece of ivory card in half.
I then cut out a piece of pink card slightly smaller than the card blank
I stamped opposite corners with the floral corner stamps and covered in the embossing powder.
Using a heat gun I set the embossing powder to reveal a beautifully subtle shimmery finish. I continued by edging around the pink card layer with embossing ink and powder
Step 4
Finish off by layering the embossed card to the card blank and
then adding the bouquet image using sticky pads to raise it slightly.
Add the birthday sentiment to the bottom corner and three little pearls to the top corner.
Thank you for visiting Today!


Comments
Post a Comment