Embossed Eastern Promise Card
Good Morning Crafters
WOW this week sure has gone in a flash!
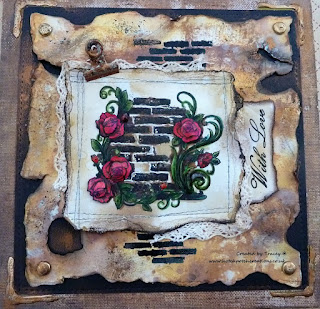
Today we have a beautiful Eastern Promise project by Tracey!
Products Tracey has used can be found on the Personal Impressions website.
You will need the following for this project:
Sweet Dixie – 6”x6” Stencil Vintage Background
Sweet Dixie – A4 Card stock – Chocolate
Sweet Dixie – A4 Card Stock – Latte
Sweet Dixie - Embossing Powder - Champagne
Kaiser Crafts – Vintage Timeless 6 ½ “ Paper Pad
Sweet Dixie – Clear Stamps – Daisy and Bottles
Purple & Orange satin ribbon
Heat Gun
Double Sided Tape
Memento Ink Pads
Gather all the great goodie for this project as
seen in the photos above.
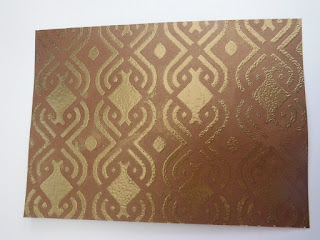
First we start my using a piece of the Chocolate
Card stock I cut mine to 6” x 11” and then layered the Stencil over the top of
the card, now using Versamark clear pad I rubbed it over the stencil pressing
to get the ink into the pattern of the stencil. When you lift it off you should
be able to see the pattern.
Quickly whilst the ink is wet scatter the
embossing powder over the design (I would make sure you have a spare sheet of
paper under neither to collect the excess powder) making sure you get the
powder on the whole design, shake and bang on to the spare sheet (you can then
funnel it back into the pot for next time) Using a heat gun, evenly heat the
sheet until the powder turns to a Gold shiny look.
Step 3
Once the sheet is cooled down enough you can now
trim the embossed card stock to the desired size. I am going to be making a A6
size card so I have trimmed it down to 9.5cm x 13.8cm – this will leave you
some extra for another project.
I have taken a sheet of the Latte Card stock and
cut that to make my A6 card blank and folded that. Then using double sided
sticky tape I have adhered the embossed sheet to the front of the card blank.
I decided that the pattern reminded me of a trip
to Moroccan Holiday and so I added some purple and orange satin ribbon to the
side of the card.
Step 5
Next because of the travel feel to the card I
went with some of the papers in the Kaiser Crafts 6 ½ “ Paper Pad called
Vintage Timeless and cut elements and shapes out of some of the sheets. And
stuck them into the middle of the card.
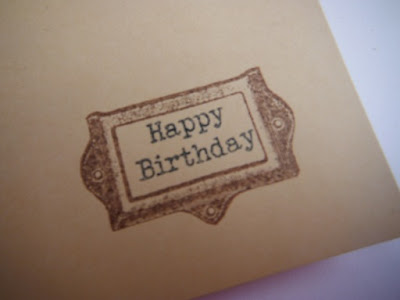
To finish I have added a stamped sentiment from
the Sweet Dixie’s Set called Daisy & Bottles – in the set there is a frame
stamp and some sentiments which I stamped onto some off cuts of Latte cardstock
and then cut the frame out and stuck on the card.
Step 7
All finished and would be great for someone who
loves to travel.
I have never used Sweet Dixie products before
and I have to say I am very impressed with the products, the card stock is a
fantastic weight for embossing, folding or die cutting and the stamps print
perfectly. I will definitely be getting some more of these to use in the
future.
Thank you for stopping by Today!


Comments
Post a Comment