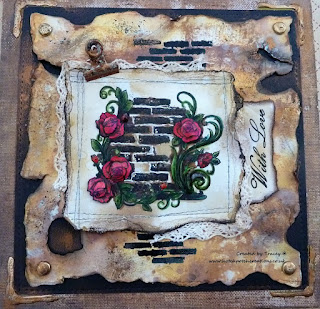
Easel-ily Shabby Chic
Good Morning Crafters
Today we are sharing a beautiful step by step easel card by Tracey.
Products used can be found on the Personal Impressions website.
Check out the Stockist Locator on the home page for a stockist near you!
Pull up a chair and grab a cup of coffee for this in depth step by step!
Items you will need for the following:
EASYSC380 – Studio light Shabby Chic easy
die cut decoupage sheet
PPJBS17 Janneke Brinkman –Salentijin
Quality Papers 6” x 6” Pad
White Smooth Personal Impressions Card
Stock
Eleganza Adhesive backed sparkly gems
Wooden Embellishments
Dies for layering shapes
3d Foam sticky pads
Stampin Up Punch – Trio of flowers
Step one is to get all the lovely elements
together ready for the project and here they are.
Too start with I have popped all the
elements for the decoupage out of the sheet and trimmed any bits off the edges
and started to piece the topper together using 3d foam pads.
The next stage is to decide on the papers
you want to use to match the topper we have just made. I have selected 4
sheets to use at this point for the layering.
I am now making the Easel card which I
have made starting with a 14.8cm x14.8cm square card blank and then cut a 2nd piece of cardstock into a square
piece measuring the same as the card blank, On the main card blank you need to
fold one side in half again so almost like a tent, I have drawn a line on the
back of the square panel after measuring it against the new fold so I know
where to apply the sticky tape too when I construct the base as seen in photo 9
Firstly I have decorated the top section
of easel card, I have used one piece of the patterned paper and cut to 138.8cm
x 13.8cm and stuck this down, then I took a piece of pink paper and trimmed to
11.8cm x 12.8cm and then I have fixed the lace on the front and stuck down at
the back, then stuck that down on to the top of the easel card. Then you can
add your decoupaged topper on the backing pieces using 3d foam.
I have repeated the layering process on
the base layer of the easel card using the remaining papers I chose earlier. I
have used the slim off cuts from the backing panel to make a ribbon effect on
this layer, you can stick this where ever you would like or even use ribbon if
you prefer.
This next stage is to make the topper
element for a sentiment and this also acts as the prop for the easel part of
the card so that it stands up. I have used matching papers from the pad and cut
2 sizes of similar shapes, one from a die and 1 from a punch, I have again used
a strip of offcut paper on one of the layers and then stamped a sentiment on
the smaller shape, these have been layered with 3d foam to allow for the rise
so that the top panel stays stood up against the raised sentiment.
Now you can see the card in all its glory
and it is now all about adding the final elements to make your card.
I have now punched some small flowers from
the papers and also stuck on some wooden embellishments which match the theme.
I have glued the punched flowers on to the jug embellishment too match the cup
on the chair in the topper.
I have then finished off the card by
adding some gems to the flowers and as extra blink on the main panel.
All finished and ready to go, a lovely
easel card and great for lots of occasions.
Review of the Products used: Out of 5 Stars
This decoupage sheet is stunning, lovely
images and very easy to remove from the sheet - 5 Stars
The smooth cardstock is a lovely card for
colouring and great for panels rather than card blanks due to it’s gsm weight –
5 Stars
Studio Light – JBS collection pad – I love
pastel colours and this pad is full of stunning papers to choose from and also
a great thickness at 170gsm per sheet – Great to use for all projects – 5 Stars
Eleganza Sticker Gems – This is the second
time I have used these gems and they stick to anything which is great as I have
had some in the past from other companies that I have had to use glue to stick
them properly. So well done Eleganza & Personal Impressions, they are great
– 5 Stars
We hope you have enjoyed this step by step!
Why not share your easel cards on our Facebook Page!
Many thanks for stopping by Today!


Absolutely stunning the colours and the design are wonderful.
ReplyDeleteDebs xxx
{Debs Cards}
Fab card x
ReplyDelete