Posts

Nature and Botanical

Image
We just love using rice papers, because they are so versatile, and when you use them alongside stencils, the results are amazing.  Shopping List Mod Podge Assorted Designs of Rice Paper  (See our collection here ) Stencils (See our range here ) Botanical Fun 1 Choose a focal image from your rice paper and lay it onto the centre.       Start layering up all the areas using the 2 different rice papers.     To tear rice paper, use a paint brush and water and go round the area.   2 Once your  layout is finished, start fixing to the canvas using mod podge with a flat brush. 3 Once dried, start adding definition and texture effects using your stencils with distress inks. 4 Use your contrasting pink and brown distress inks to blend the sections into each other.  This will make it look like it was one full backing paper not lots of different elements. 5 Add extra elements to your canvas, and finish by adding a layer of mod podge to sea...

Candle Holders

Image
  Candle Holders are a must in most houses, and if you can customise them. they'll become a talking point when you have guests round for dinner. Shopping List Mod Podge  (available here ) Assorted Designs of Rice Paper / Gems  (search our range here ) Candle Holders 1 Make sure the glass surface that you are decorating is clean and dry. 2 Tear up decoupage paper into small pieces and choose a central image.  3  Use Mod Podge to attach the central image first and then add the other pieces around until the whole glass is covered. 4 Once the first layer is dried, coat the glass with another layer of Mod Podge. 5 To finish fix self adhesive gems around the top of the glass tea light holders as shown.

Blue Bird Singing Canvas

Image
Create this stunning Blue Bird Singing canvas in a few easy steps using rice papers, distress inks, stencils and a few other items - all available from the Personal Impressions website. Shopping List Mod Podge White Acrylic or Gesso Assorted Designs of Rice Paper Acrylic Stamps Plain tissue paper Stencils Sweet Dixie Trellis Metal Die Distress Inks Scattered Straw, Mustard Seed, Faded Jeans, Broken China. Adirondack inks Eggplant and Currant. Metallic Paints 1. To start with tear up random pieces of brightly coloured patterned paper and attach to the canvas using Mod Podge. 2. Make another layer using torn, scrunched pieces of tissue paper of various colours, creating texture with ridges and creases. Allow some of the under layer to show through. 3. Use White Acrylic Paint or White Gesso to paint a thin transparent layer paint over the canvas, so that the colours/ patterns can be seen underneath.  This will give interest and dimension to your project. 4. Using any acrylic stamp des...

Wow, where does the time go!

Image
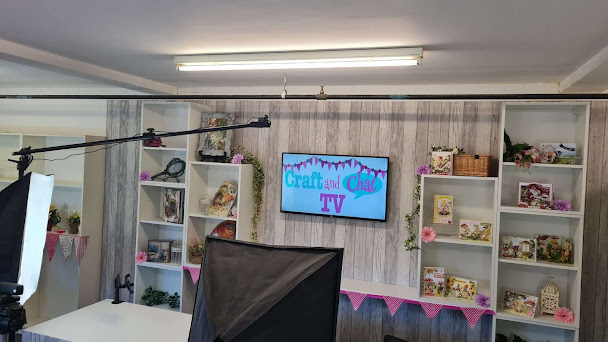
Blink, and five years have gone by!!  Time certainly does go by very fast in the craft industry!  If you have found this blog from Sweet Dixie products, then you are in the right place. For more information on Sweet Dixie products, and indeed on all of the products that Personal Impressions carries - which is over 30,000, then click on the link below to go to our website. https://www.personalimpressions.com/ One of the things that we've done in the last 5 years is, we've built a studio! We now have our own shows every week on www.facebook.com/craftandchattv Be sure to go over to facebook and follow the page for updates on when we will be live.

Sweet Dixie Wall Flower by Tracey Fairgrieve

Image
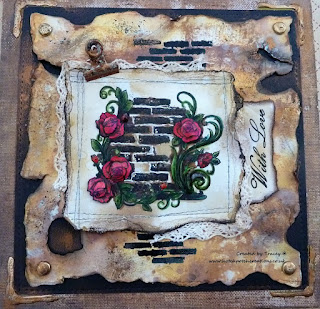
This week I have been playing with another of Kath Halsteads new releases   Sweet Dixie Wall Flowers Happy Birthday  Stamp set from Personal Impressions. First I created a background using Tim Holtz new Distress Oxide inks , using Vintage Photo, Fossilized Amber and Spiced Marmalade. Applying the ink with cut and dry foam I removed part of the design by splashing and dripping water lifting it off with blotting paper. Small amounts of DecoArt textured Sand paste was dabbed randomly onto the background, when dry the edges of the background torn and areas carefully burnt through to add a little interest. The main wall flower image was stamped centrally onto the background adding the brickwork stamps both top and bottom of the image to extend the design. The focal image was also stamped separately for use as a topper. Coloured using ProMarkers the topper has been distressed using  walnut stain distress ink. Faux stitching, lace and white...

Easter Bunnies with Sweet Dixie Stamps by Teresa Morgan

Image
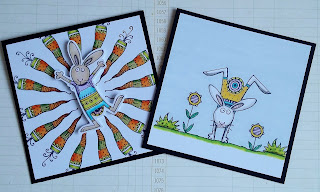
I know that we are barely saying goodbye to winter, but as crafters, our thoughts are turning towards Easter. This set of Sweet Dixie stamps is perfect for creating some fun cards for your friends and family. Today I am sharing a couple of ideas for you: I stamped the images with Memento Tuxedo Black ink as I wanted to use my Promarkers to colour them. The funky carrot is perfect for creating a fun background. I added the jumping bunny on 3d foam to pop him up form the base. I created a little scene with the handstand bunny and flowers, adding in a doodled line for the ‘ground’. Thanks for stopping by to look at my project today, hope to see you again soon! Stamps Used: Honey Bunny by Sweet Dixie stamps at Personal Impressions designed by Cathie Shuttleworth

Sweet Dixie Friends and Flowers

Image
If you enjoy colouring you will love this Sweet Dixie Friends and Flowers  stamp set. Designed by Sue Dix. This is the second set from her newly released everyday collection from Personal Impressions  . Consisting of one large window box stamp with two heart-warming sentiments I have just pure and simply stamped and coloured using ProMarkers,  A blender pen has been used to create polka dots on the curtains and  Kuretake clear Wink of Stella adds a little glimmer to the windows. Matt and layered onto black and gold card,  I added this sentiment from the set as I find it so uplifting. Just like Sue's   Sweet Dixie Wishing you a day as special as you   the focal stamp gives you a blank canvas to be as bright and bold as you wish. Another set where it's use is limitless. Thank you all for stopping by.. Wishing you all a wonderful weekend.. Creative Hugs from Tracey xx