Posts

Showing posts from October, 2015

Zendoodle Big Owl

Image
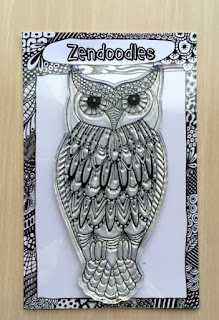
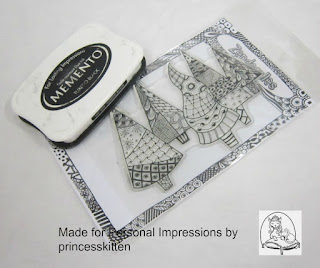
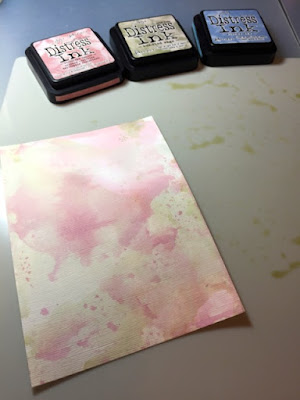
Good Morning Crafters   Sam has created a fabulous tag using Lindsay Mason's Zendoodle Owl.   How many of you love owls? I know I do!   Visit the Personal Impressions home page for the Stockist Locator to find a stockist near you!   Products Sam has used: Zendoodle Big Owl Ready To Go, by Lindsay Mason Viva Inka gold and silver Distress inks   Step 1   Stamp the owl twice with Versafine sepia ink, Colour the first one with inka gold and silver, add both colours onto acetate and add water to watercolour the owl, fill in the remanding areas with Distress Ink, Walnut Stain.   Step 2   Colour the second owls face and feet with Distress ink Scattered straw and Walnut Stain.   Step 3   Cut out the owl, face and feet. Step 4     Shape with a ball tool on a matt.   Step 5     Using 3 different colours of liquid pearls for the dots on the head and body Step 6 

Lindsay Mason Zendoodle Trees

Image
Good Morning Crafters   Today we have a beautiful card created by Pandy   Products Pandy has used can be found on the Personal Impressions website.   You will need the following to create this card:   Lindsey Mason Zendoodle Trees Ready To Go stamp# Lindsey Mason Inspirational Quotes stamp set Memento Ink Pad Tuxedo Black Your favourite colouring product White card stock to stamp on A4 coloured card stock to make the card Patterned papers for the backings Double sided tape Gems to decorate the trees       Step 1     Stamp the trees image twice on white card with the Memento Black Tuxedo  Step 2   Colour the trees and cut out   Step 3     Score the A4 card at 7.5cm - 15cm -15.5cm - up from the short edge.  Crease along these lines to make your card base.  Then take another A4 sheet of card – score and fold in half – trim off the bottom 0.5cm and mount the folded section on the front of the card.

Zendoodle Flower

Image
Good Morning Crafters   Elaine will be sharing her step by step project today using Lindsay Mason's Zendoodle flower.   You can visit the Personal Impressions website to see the full range of Lindsay's stamps we stock. Don't forget to check the Stockist Locator for a stockist near you.   Lindsay Mason Zendoodle flower Memento black ink pad White card Promarkers/alcohol pens Black doodling pen.   Step 1   Ink up the image and stamp onto white card stock using a momento black ink pad. You will need to use a momento ink pad if you are colouring the image with alcohol pens otherwise it will bleed. Then doodle on the image using a pencil and then later when you are happy with your doodles draw over with a black pen and rub out the pencil.   Step 2  Next colour the image in using alcohol pens.   Step 3   Cut out the image. You can cut into the flower and the shape the petal and leaves into shape to creat

Zendoodle Folk Heart

Image
Good Morning Crafters   We have another beautiful project for you created by Sam   Check out the Stockist Locator on the home page of the Personal Impressions website for a stockist near you.   Products Sam has used:   Zendoodle Folk Heart Ready To Go by Lindsay Mason Distress Inks Victorian Velvet, Peeled Paint, Bundles sage, Stormy Sky Viva Inka Gold  Step 1     Place one ink on matt and spritz with water and wipe card in colour, then dry. Repeat with the different colours. Until the background has been created. Step 2     Stamp the Folk Heart and water colour in with the same distress inks that where used to make the background. Water colour the bird with Viva Inka Gold.  Step 3     Cut the heart and bow out. Liquid pearls Brass, has been used on the fine lines on the heart.   Step 4   Stamp the Bird in the heart again and paint with Viva Inka Gold, cut the bird out and shape with a ba

Pink Blossoms

Image
Good Morning Crafters   Today we are sharing Sam's step by step using Lindsay Mason's Blossom stamps   You can find the products on Personal Impressions website.   Lindsay Mason Designs Stamps, Blooms of Hope and Flower and flourishes. (Pink Blooms 1)     Stamp flowers with Versafine onyx black ink and colour the background card with distress inks, Seedless Preserves and Picked Raspberry using the inkssentials tools. Sprinkle some water on to give a texture look and dry.     Colour the flowers with the same inks and cut out.   Lightly spray the back of the flowers with water and shape with a ball tool.   Add glossy accents to the centre and sprinkle with distress glitter seedless preserves.        Stamp swirls and words onto the background card.   Add by drawing faux stitching around the edges with a fine pen. Layer into black card. Glue the flowers on with 3D glue, layering the larger o

Lindsay Mason's Zendoodle Christmas Stamps

Image
Good Morning Crafters   The ladies on the team sure have been busy creating very simple and intricate creations using Lindsay Mason's Zendoodle Stamps.   Today Pandy has more simple creations which would be ideal to involve the children in making their own cards for their friends and family. These stamps are large and clear enough for the children to colour and are perfect for big block colouring.   Check out the Personal Impressions website to see more of Lindsay's stamps   You will need the following: Lindsay Mason stamp – Zendoodle Snowman and Zendoodle Trees Memento ink pad – Tuxedo Black White card to colour on A4 coloured card for the actual card Double sided tape      Cut the white card to 11cm x 16cm and stamp the image in the centre of the card using Memento Tuxedo Black.   Colour the image with your favourite colouring product.  Memento is waterproof and Alcohol ink friendly- so you can use anything to colour.    

Shaving Foam Technique

Image
Good Morning Crafters   Today we are sharing Sam's step by step using Lindsay Mason's Tattoo Bird.   We have a stockist locator on the home page of the Personal Impressions website to help you locate a stockist near you.   She has used the following products:   Tattoo Bird, Lindsay Mason Designs. Dylusions Inks Distress Inks Versamark ink pad   Step 1 To create a Background using Cheap Shaving Foam.( no added moistures ) Spray a good amount and smooth it out. Step 2     Spray with your favourite colours, a variety of Dylusions inks.  Step 3   Using the end of a medium sized paint brush, make a pattern through the colours. Step 4     Place a piece of card on top and lightly press.   Step 5   Pull the card away from the foam and scrape off the excess foam with a spatula to reveal the pattern.  Step 6   Stamp the bird with versamark and heat emboss with black embossing powder, and the word Joy.