Posts

Showing posts from December, 2015

Thank You

Image
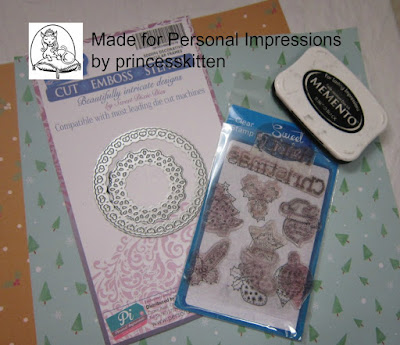
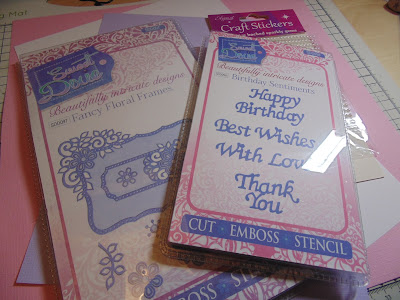
Good Morning Crafters   Today we are sharing Gill's card today, she has created a thank you card which we all love to give in thanks for the gifts we have received. Personal Impressions website has a stockist locator which enables you to find a stockist near you.   To create this project you will need the following: Sweet Dixie Dies – Embroidery Style Frames and Birthday Sentiments My Colours Cardstock – Snowbound Eleganza Craft Stickers - Gold Scalloped card blank Pro marker – Burgundy Organza Ribbon - Burgundy   Step 1   Die cut the Embroidery Style Frames.     Step 2 Using sticky pads stick each frame to the card blank. The bottom and top frame should be square and the middle frame turned to make a diamond. This will give dimension to the white on white   Step 3 The craft stickers come in strips. For this card you will need to cut in between the gold pearls to use as singles. Step 4   Place the individual pe

Tag Pocket

Image
Good Morning Crafters   We hope you all had a wonderful Christmas, all that planning and it is over in the blink of an eye.   Today we have beautiful project by Pandy.   Check out the  Personal Impressions website for our vast range of products. Don't forget to use the Stockist Locator to find a stockist near you.   You will require the following for this project.   An empty toilet roll  Marianne Design Pretty Papers bloc – French Roses  Sweet Dixie Decorative Circular Frames (SDD094)  White card for the tag and to stamp on  Something Tattered stamp – Table set (ST01)  Memento ink pad – Bamboo Leaves Pretty sentiment stamp with a verse  Pearls – ribbons – bits to decorate  Double sided tape   Step 1   Fold the toilet roll flat and crease well.  Wrap the paper round the outside – crease well on the sides – then secure the flat roll to the paper with double sided tape – leaving an equal amount o

Christmas Wreath

Image
Good Morning Crafters   How are you doing with your Christmas preparations, I can't believe there is only 5 weeks to Christmas!   Today Gill has created a beautiful wreath for the home.   Check out our Christmas shop over on the  Personal Impressions website, we have a stockist locator on our home page to find a stockist near you!    Products used: Kaiser Craft Holly Jolly Christmas 12 x 12 papers. A die cut large circle from scrap card   Step 1   Cut 2cm strips from 2 sheets of the Holly Jolly Christmas papers and staple / stick the ends together     Step 2   Staple the folded strips evenly around the die cut circle. Repeat this again with smaller strips in another pattern to make three layers.   Step 3   I found once the first layer was stapled on it became too bulky to use staples for the next two layers so I used PVA glue and put a weight on the until dry    Step 4   Once dry I made a little rosette from the

Studio Light Shabby Chic Christmas Tree

Image
Good Morning Crafters   Sandra has been creating with the Studio Light Shabby Chic MDF Christmas Tree Kit   Check out the Personal Impressions website for a stockist near you on our home page.   Studio Light MDF Shabby Chic Christmas Tree   Step 1   Paint the MDF trees and base with coordinating acrylic paint, in this instance cream has been used. Give the back of the trees 2 coats of paint but you only need to give the front one coat.     Step 2   The kit comes complete with papers to decorate your tree with die cut embellishments to decorate.   Glue your choice of paper from the kit onto the trees, trim around with a craft knife. Slot the trees into the base, you can use glue to make them for extra strength. Decorate with the embellishment sheet from the Kit     This makes a beautiful Christmas decoration for the home.   Thank you for visiting today!   

Christmas Star Decoration

Image
Good Morning Crafters   We have a beautiful project by Mags to share with you today.   Products used available on PersonalImpressions Website Kaiser Kraft Home for Christmas Collectables Lindsay Mason Happy, Happy Christmas Stamp Set Decopatch Stars Distress ink (mustard seed, crushed olive) Memento Black Ink Glue Glitter Twine Gems   Step 1   Blend distress ink over the decopatch star using a combination of mustard seed and crushed olive.  Ensure that both sides of the star are covered.   Step 2 Dab a thin layer of glue over both sides of the star and cover with glitter.     Step 3   From the collectables set stamp a sentiment onto a star and bird using Memento black ink.  Go round the edges with mustard seed distress ink to add some interest and colour.     Step 4 Add some twine to the string on the stars and then attach to the back of the star and bird.  Add a gem to the centre of each glit

Christmas Coasters

Image
Good Morning Crafters   This year has sure gone by too quickly!  It is nearly Christmas with only 4 more days.   Today we are sharing Pandy's Christmas Coasters with you!   Check out the Personal Impressions website for a fabulous range of products and check the Stockist Locator for a stockist near you!   You will need the following for this project:   Sweet Dixie Clear Stamp – Stitches Christmas SDCSA6009 Sweet Dixie Die – Decorative Circular frames SDD094 Memento Ink Pad – Tuxedo Black White card to stamp on Christmas background papers Pens / pencils Laminator   Step 1   Stamp the Sweet Dixie images onto the white card with the Black ink.  Make sure you leave enough room around the image to cut out the smallest circle frame     Step 2   Colour in the image and cut out.     Step 3   Use the middles sized circle to cut out some matching backing paper.   Step 4   Sit the smaller circle in the cen

Happy Birthday

Image
Good Morning Crafters   Today we are sharing a beautiful card by Gill who has used another of the Sweet Dixie Dies.   You can find the products on the Personal Impressions website and use the stockist locator on the home page to find a stockist near you.   The following has been used to create this card Sweet Dixie Die – Fancy Floral Frames and Birthday Sentiments My Colours Cardstock – Sweetie Pie, Lilac Mist and Snowbound Eleganza Craft Stickers   Step 1 Make an A5 card blank with the white card. Mat and layer the pink on to the lilac and finally a patterned paper.   Step 2  Using the pink and lilac card die cut the elements to make up the card. Use a small piece of scrap green card for the leaves.     Step 3 Shape and embellish the flowers with little pearl craft gems.   Step 4 Stick down the largest Die cut and add the flowers to the plain corners. Finish off with a Happy Birthday sentiment

3D Floral Hanger

Image
Good Morning Crafters   Today we have a beautiful 3d floral hanger from Pandy.   Products used by Pandy from the Personal Impressions website.   Check out the Stockist Locator on the home page for a stockist near you.   To create the 3d Floral Hanger you will need the following:   Marianne Design Pretty Papers Bloc – French Spellbinders Nestabilities die set – Scalloped Squares Scalloped Squares Memento inks pads – Rose Bud – Bamboo Leaves  Sponge blender Double sided tape Cord / twine to hang Embellishments to decorate the shapes   Step 1   Cut 6 of each of the 5 size squares and score across the centre from corner to corner.   Step 2   Ink all the edges with the Memento inks Step 3   Crease the first shape well – put double sided tape on the outer edges – crease the next shape well – match up the edges of all the outer bumps and peel the backing off the double sided to secure.   Step 4   Match up all 6

Happy Birthday with Sweet Dixie Dies

Image
Good Morning Crafters   How are you all today?   Today we are sharing a beautiful easel birthday card by Sandra.   She has used the new Sweet Dixie dies which can be found on our Personal Impressions website and we have a stockist locator on the home page so you can find a stockist near you.   To create this project you will need the following:   Sweet Dixie Scroll Edge and Happy Birthday dies My Colour Cardstock Eleganza Gems Pink organza ribbon       Take 3 pieces of cream card, o ne 12 x 5.5 score that in half and at a quarter then take another piece measuring 5.5 x 6 and another measuring 3.5 x 5.5  attach the edge die to both and cut to matt cut slightly bigger and draw  around the die and cut by hand  Attach both pieces to the card, score the smaller on to create a flap for the top to stand against    Add the happy birthday which has been cut using the pink card. Make a bow with the ribbon and added the gems to finish