Posts

Showing posts with the label Studio Light My Botanic Garden Pack

Botanical Canvas

Image
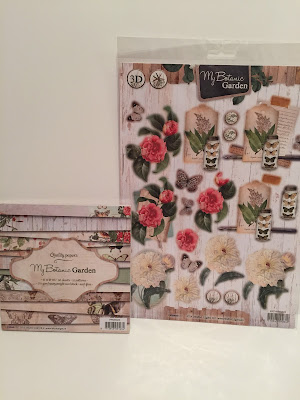
Good Morning Crafters   Today we have a beautiful step by step by Tracey.   She has used products from the Personal Impressions website. Check out the home page for a stockist near you!   My Botanic Garden Quality Papers 6”x6” Pad by Studio Light Eleganza Adhesive backed sparkly gems Tim Holtz – Distress Ink Ranger – Spritz bottle From my stash     Green Floral lace edge ribbon Hessian Ribbon Canvas A5 size Ink Duster Paper flowers Crackle Accents Step one is to get all the lovely elements together ready for the project and here they are.   We start with distressing the blank canvas by first dusting the corners and edges with the ink, then I have rubbed the pad across the surface for added colour and then sprayed the canvas with the spritz spray to add even more texture to the canvas as a base before we begin construction.   The next stage is to take a ...

Birdhouse

Image
Good Morning Crafters   How are you all? Did you have a good weekend.   Well a leap year this year so the last day of February today, were have these 2 months gone?   A beautiful step by step tutorial by Samantha to share.   Products used are from the Personal Impressions website.   For this project you will need the following:   Birdhouse, Marianne Design Collectables. COL1308. My Botanic Garden Pad, Studio Light. PPMBG20. Craft UK LTD C6 white card, 250gsm PI Smooth White Card. Sweet Dixie Dies  SDD102 Delicate Blossoms. Viva Inka Gold. Oaktree 4mm pearls. Vintage Photo and Peeled Paint Distress Ink. Viva Inka Gold. String   Step 1   Cut a piece of decorative paper from the pad to fit the C6 card, ink around the edges with Distress ink. Cut a mat from the green paper and distress the edges with a tool. Colour the leaves cut with the Sweet Dixie Dies...

Decorative Tag

Image
Good Morning Crafters   Today we are sharing a project created by Sam   Products used are available on Personal Impressions Website   Products you will need for this project: My Botanic Garden Pad, Studio Light. 3D die cut sheet from the same collection EasyMBG 423. Craft UK LTD C6 white card, 250gsm. Silver ribbon. Vintage Photo Distress Ink. Stickles, Star dust. String.   Step 1   Push out the tag, butterflies and faux button die cuts, shape with a ball tool and mat. Layer up with 3D glue.    Step 2 Cut a decorative page from the paper pad to fit the C6 card. Ink the edges with Vintage Photo, Distress Ink. Cut a green mat from the pad and distress edges. Add some string to the tag.     Step 3   Layer all the elements with 3D glue. Glue on the Butterfly and faux buttons. Tie a bow with silver ribbon. Highlight flowers and butterflies with...

Studio Light My Botanic Garden

Image
Good Morning Crafters   We hope you had a good weekend and got some crafting done.   Today we have a step by step project for you by Samantha.   Check out the Stockist Locator on the Personal Impressions home page to find a stockist near you of the products Samantha has used in her project.   For this project you will need the following:   My Botanic Garden Pad, Studio Light. PPMBG20. Craft UK LTD C6 white card, 250gsm. Crafty Impressions Chiffon Flower Pearl. Oaktree 4mm pearls. Viva Inka Gold. Antique Linen Distress Ink. Stickles, Star dust.   Step 1   Take a decorative page from the pad and cut to fit a C5 card. Cut two other smaller pieces and distress with a tool.   Step 2   Colour the edges of the paper with Antique Linen, Distress Ink. 3D the small rectangles to the card with glue.   Step 3   Glue the chiffon flowers onto the card. Ad...

Dali Art Henna Poppy Stamp

Image
Good Morning Crafters   Today Samantha is sharing a step by step with you using Dali Art Henna Poppy.   Check out the Personal Impressions website to see the range of Dali Art stamps we have. Dali has created stamps where East meets West.   For this project you will need the following:   Dali Art Henna Poppy. DLCSA6017. My Botanic Garden Pad, Studio Light. PPMBG20. Craft UK LTD C6 white card, 250gsm PI smooth white card. Viva Inka Gold. Oaktree 4mm gold pearls. Vintage Photo and Victoria Velvet Distress Ink. Versafine Vintage Sepia. Viva Inka Gold. Stickles gold and star dust glitter glue.     Step 1   Stamp the Henna Poppy onto the Studio Light paper, then again onto the smooth card twice with the Versafine ink. Colour the two flowers in with Victoria Velvet Distress ink. Put the Inka gold onto acetate and water colour to highlight poppy.     Step 2 ...

Floral Card

Image
Good Morning Crafters   Well this week sure has gone in the blink of an eye.   Today we are sharing Samantha's project with you!   Products used are available on Personal Impressions Website You will need the following:   My Botanic Garden Pack, Studio Light. PPMBG20. 3D die cut sheet from the same collection, EasyMBG 423. Craft UK LTD C6 white card, 250gsm. Crafty impressions, Crystal Stickers, Iridescent. pink ribbon. Viva Inka Gold. Stickles, Star dust.       Push out the pink flower die cuts, shape with a ball tool and mat. Layer up with 3D glue.      Cut a decorative page from the paper pad to fit the C6 card Join the page so the decorative sides are on both side. Hide the join with the ribbon and glue to the back of the paper.   Add the Inka gold to the edges of card. Glue on the 3D flower. Tie a bow with matching ribbon.     ...